

Embed Your Hook(s) For A Perfect Running Lure
Posted by Brian Richardson on
Note, the purpose of embedding your hook into the back of the lure head is to create a method to hold the hook in a steady position while it is being trolled. This eliminates it from fouling in the skirt or leader and makes the lure run perfectly. But it is important to note that your hook assembly must be able to pull free once a fish is hooked. Otherwise the fish can use the weight of the lure head itself to shake the hooks free during the fight. This system of embedding your hook accomplishes both goals.


With this method of embedding your hook assembly you eliminate any chance that your hook assembly might be causing your lure to pull through the water improperly. Whether you rig with a single hook or a two hook assembly like this one, you absolutely must be able to hold the head with one hand and pull the leader with another and see NO movement in the hooks when you pull them tight against the rear of the head. If it isn't stable,that is exactly what the hooks will be doing as you are trolling your lure through the water.
1. The first picture shows the materials that you need to complete this rig. Normally your lure head will already be skirted. I left the skirts off to make it easier to demonstrate this method but it can be done easily with the skirts on the head. You will need a hook or pro rigged hooks, leader, proper sleeves, spring type loop protector, lure head and heat shrink tubing.
2. In the second picture you can see that I put the loop protector through the eye of the hook and the crimped a sleeve.
3.Next, I slid down a piece of heat shrink tubing and heated it. This made a relatively stiff connection between the leader and the hook. It also gives some cover of protection to the loop which will come in handy later in the process.


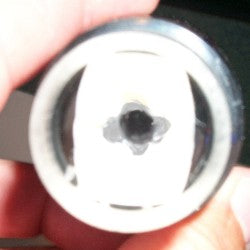
4. Look at the picture of the base of the lure head. Most lures will have a plastic or epoxy material of some sort as the tying collar. This material is normally fairly soft and easy to work with. If you are using a metal head , this method isn't going to work. You would have to make a special rubber or plastic insert, but that's another article.
5. To do the reaming I like to use a Dremel tool with a very tiny reaming ball. You can use a drill bit to do this but you break a lot of bits when you do.
6. You are going to ream out a simple cross that your hook assembly can slide into. Take it slow and keep checking as you ream and don't forget to keep the cross straight on the head or you'll have your hooks sticking out in a weird angle. Important note; if you look at your hook/leader assembly, you'll notice that the place where you covered your crimped sleeve with shrink tube is a larger diameter. You may need to take a standard drill bit and drill a larger hole into the base of the head so your assembly will fit up into the base.

7. When you get your cross reamed perfectly, the hook assembly will slide right up inside the base of the head. The hooks will ride just as you have placed them as you are trolling. The fit should be snug enough that the hook assembly will not come out as the lure is being trolled but will release when a fish hits it. The reason you do not want it to remain solid is that a hooked fish can throw the hooks more easily if it has the leverage of your lure still attached to the hooks. Don't worry if you accidently reamed it out a bit too large. You can make it tight again by adding some more shrink tubing over your cross. If you really, really made it too big, you can also use something like window caulking rope to help make it snug again.
This rig will pull through the water perfectly! It also tends to stabilize the path of the lure by acting as a rudder system. When you drop the lure out, it orients itself and them stays with that same orientation instead of slowly spinning like a lot of so called "balanced" lures will do.